
How Consecutive POC Daily V2 works
I built this indicator around one idea: the Point of Control (POC) — the price where the most volume trades in a day — shows where value sits. When value keeps shifting the same way day after day, the market is trending, and that’s what I want to trade.
The logic
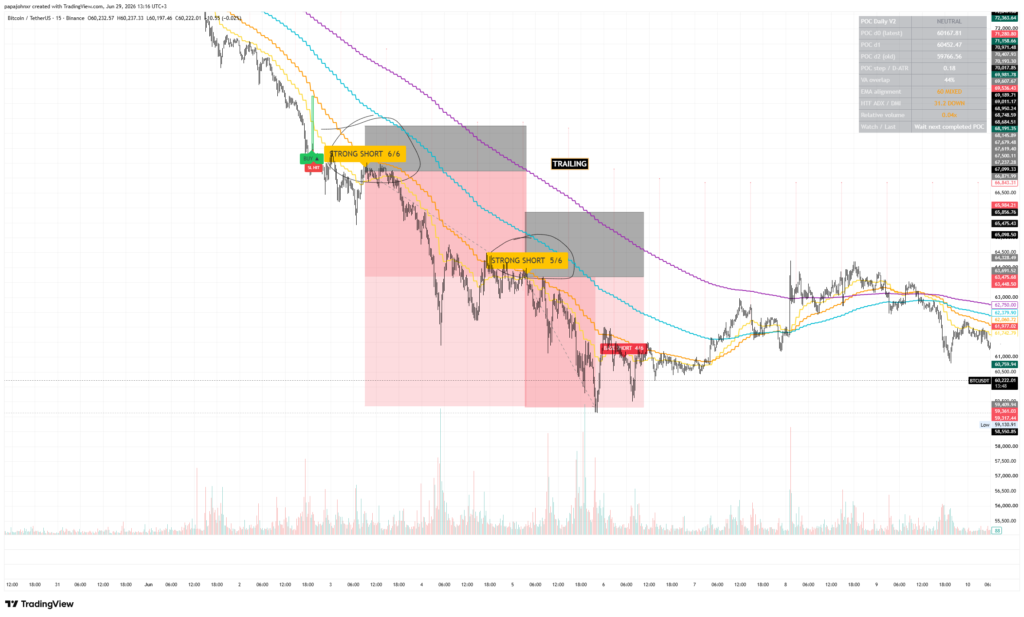
Every day the script builds a volume profile and saves that day’s POC. It then compares the last three completed daily POCs (d0, d1, d2). If they’re stacking up (d0 > d1 > d2) I’m hunting longs; if they’re stacking down, shorts. One flip isn’t enough — I wait for a second POC in the same direction before I trust the new bias.
The trigger is intraday: when price closes back across yesterday’s POC (d0) in the direction of that bias. That cross is the signal.
BASE vs STRONG
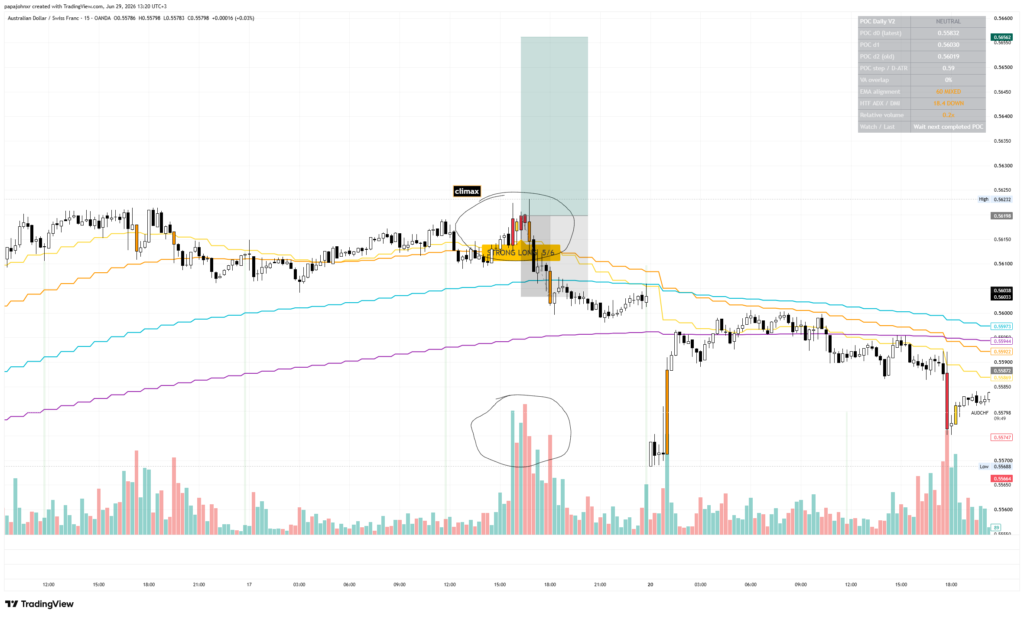
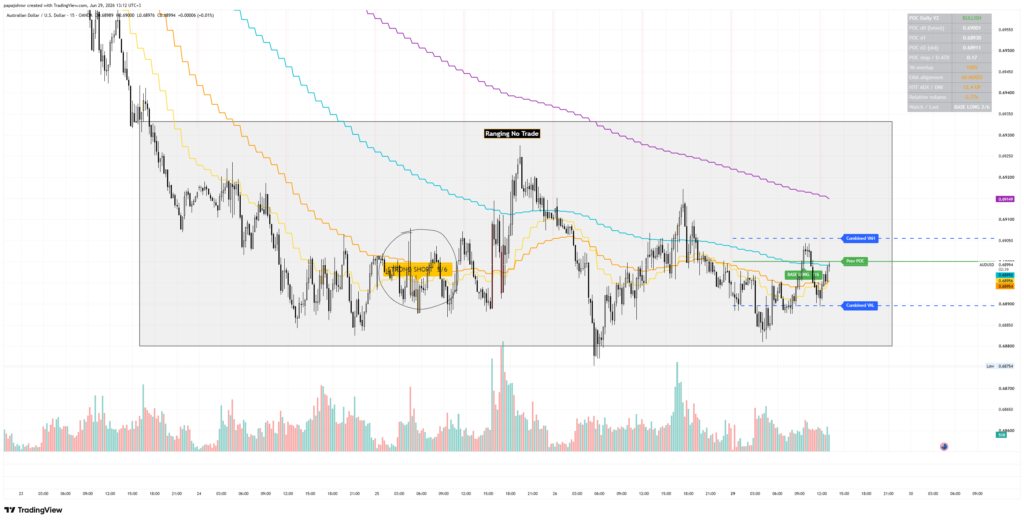
Not every cross is equal, so each one gets a score out of 6: POC displacement, value-area overlap, 1H EMA stacking (9/21/50/100), 1H ADX/DMI direction, relative volume, and the quality of the crossing candle. A high score prints a STRONG signal (gold); everything else is BASE. STRONG just means more boxes are ticked — it is not a guarantee.
Timeframe & settings
I run this on the 15-minute chart. The moving averages are tuned to read the 1H timeframe, so my trend filter sits one degree above my execution but that’s an input, so you can change the EMA/ADX timeframe to fit your market and style.
Where it can fail read this
The honest part. The tool reacts to a POC cross, so it can fire straight into a climax the last exhausted push of a move. The script can’t feel exhaustion; you have to. If the crossing candle is a huge, over-extended bar into an obvious high or low, read it as a climax in the price action and skip it.
The second trap is range. When the market is balanced and price chops around the POC, you’ll get crosses back and forth with no follow-through. In a range I don’t take signals. I wait for price to leave value and trend again.
How I manage the trade
- Stop loss goes below the clear previous low (longs) or above the clear previous high (shorts) the obvious structure point, never a random distance.
- I take partial at TP1 and move to breakeven after TP1, so the trade becomes risk-free.
- A flat 1:1 RR works well if you want it mechanical.
- But the real edge is the wave: if the move is running, trail the stop and keep the trade open instead of capping it. Catch the wave, ride it.
That’s the whole system: set the bias from the daily POCs, take the cross in that direction, skip climaxes and ranges, and manage with structure stops plus a trailing stop when it runs.